Life has changed there is no doubt and we wanted to reach out to see how you are doing.
As we go through this interesting time, we are trying to look at this as an opportunity to focus on our family and on friends like you. Let us use this extra time to catch up and talk more. Let us cook food that is not fast, but interesting and satisfying. Let us learn to enjoy a time to try new things. Let us find ways to enjoy time at home!
Computer Security
If my client base is any experience, anyone can be a victim of a Ransomware, Malware or Virus attack.
What can you do about it?
I conduct audits of your entire computer infrastructure and apply best practice solutions to plug the security holes on your computers, Smartphones and networks.
Now offering consultations to give you the best protection possible:
1:10 PMHigh Tech House Calls, Expert Computer Consulting
Facebook is a classic “love-hate” relationship. Love
the communication with family and friends. Hate all the nonsense
clogging up the news feed. Fortunately, there are a few really easy
steps you can take to control your Facebook experience.
1. Auto-playing videos
A
year ago, Facebook decided that its users wanted any videos in the News
Feed to start playing automatically when they scrolled past them.
Wrong. Facebook users were understandably upset. Not only was it
annoying to suddenly get blasted with sound, videos use up cellular data
on mobile gadgets.
Turning
off auto-playing video is simple. For the Facebook website, go to your
Facebook profile. Click the downward arrow in the upper-right corner and
select "Settings." At the bottom of the left column, click "Videos."
Then next to "Auto-Play Videos," choose "Off."
In
Android, open the Facebook app and tap the icon with the three
horizontal lines to the left. Then scroll down to "App Settings" and tap
"Autoplay." You can set it to play "On Mobile Data and Wi-Fi
Connections," "On Wi-Fi Connections Only," or, my personal favorite,
"Never Autoplay Videos."
For iOS, open your
Facebook app and at the bottom-right corner tap "More." Scroll down and
tap "Settings" and then "Account Settings." Find and tap "Videos and
Photos" and under Video Settings tap "Autoplay." You can set it to play
"On Mobile Data and Wi-Fi Connections," "On Wi-Fi Connections Only," or
"Never Autoplay Videos."
Tired
of a Facebook game app you installed years ago still sending you
notifications every other minute? You can easily turn off app
notifications if you know where to look. In fact, you'll probably want
to remove most of your apps entirely because they can share your
information with the app developers.
To find your
installed apps, go to your Facebook profile and click the downward arrow
in the upper-right corner. Select "Settings" and in the left column
click "Apps." You'll see every app you've ever installed on the left.
Hover
over an app and click the pencil icon to edit its properties. You can
choose what information it can know about you and if it can send you
notifications. You'll want to change it to only get the most basic
information possible and change Notifications to "No."
Do
you have friends who post dozens of things on Facebook every day, but
it's mostly shares from political, potty humor or inspiration pages? You
don't want to block your friend entirely, but you'd rather not see
those posts you don't care about.
If your friend
is constantly sharing from the same pages, you can actually block those
pages specifically. Click the downward arrow in the upper-right corner
of the post, and select "Hide all from ..." and you won't see any more
posts from those pages.
If you just want to stop
seeing posts from your friend without un-friending them, click the
downward arrow and select "Unfollow ..." You can refollow them later by
going to your Facebook profile, clicking the downward arrow in the
upper-right corner and selecting "News Feed Preferences." Then click
"Reconnect with people you unfollowed" and choose people you want to
re-follow and click "Done."
1:06 PMHigh Tech House Calls, Expert Computer Consulting
If you've read any of our articles on improving your Wi-Fi network,
you know that one of our recommendations when nothing else works is to
upgrade your router. It's likely your router is at least a few years
old, and a newer router is going to have the latest standards, which
means better range and more stable connections.
If you have a few gadgets in the house, any basic router is going to work OK for you.
However, if you have, or are planning to have, more than a few gadgets,
including smart gadgets, you might need something more powerful. Plus, a
more expensive router typically has better security and more advanced
options. That's why today we're going to look at high-end routers and
see what's available if you have some money to spend.
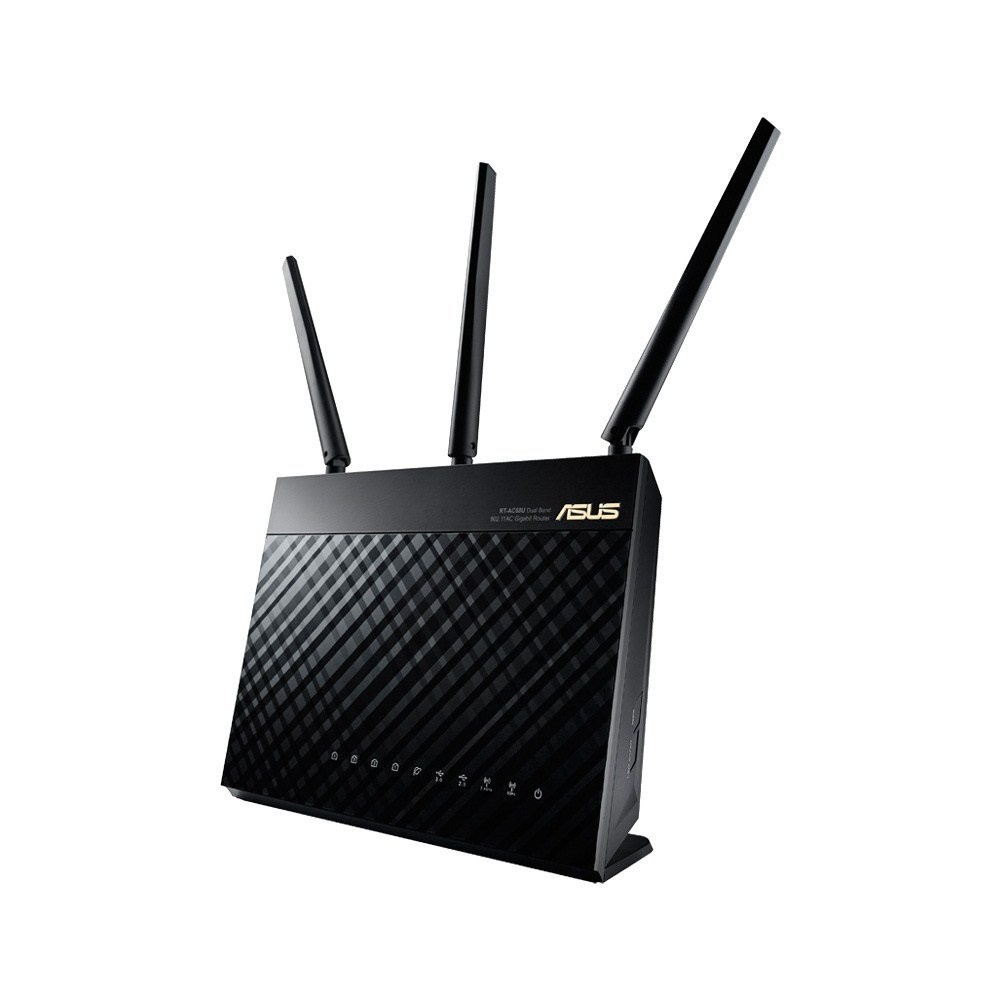
ASUS RT-AC68U Wireless-AC1900 Dual-Band Gigabit Router
Coming
in at $170 on Amazon, the ASUS isn't exactly pocket change. However, it
has some features that make up for the price. To start, it's a
dual-band router, which means it can run a 2.4GHz 802.11n and a 5GHz
802.11ac network at the same time.
This means your newer gadgets
can connect to the faster 802.11ac network while keeping your older
gadgets around. The router can deliver 1,300 megabits-per-second of
bandwidth over 5GHz and 600 megabits-per-second over 2.4GHz. That more
than enough for multiple gadgets to be streaming high-definition video.
Where
the ASUS really shines through is something called AiRadar. This
"beam-forming" technology that directs Wi-Fi coverage to where your
gadgets are. This is supposed to cut down on dead spots in your house.
It
also includes four Gigabit LAN ports for connecting wired gadgets,
along with two USB ports to hook up external storage, USB drives,
printers or even a cellular adapter to share over the network. Add in
AiProtection built-in security and a dual-core processor to make keep
things responsive, and it's a compelling package.
Plus, its
ASUSWRT management system is a bit easier to use than the standard
router software. And it works on tablets, smartphones or PC for easier
setup and control. Shop the ASUS RT-AC68U on Amazon
The
OnHub routers have 13 antennas, six for 5GHz, six for 2.4GHz and one
that keeps track of the network and makes adjustments to keep it as
strong as possible. Unlike other dual-band routers, you just connect
your gadget to the network and the router decides which frequency is
going to give you the best experience at the moment. For bandwidth, the
OnHub matches the ASUS above at 1,300Mbps for 5GHz and 600Mbps for
2.4GHz.
The TP-LINK OnHub also has a built-in reflector that
makes the 2.4GHz network stronger in one direction, which is good for
really covering the entire house. There's also a more expensive ASUS
OnHub model that does away with the reflector, but lets you assign more
bandwidth to specific gadgets with a wave of the hand.
Aside from
Wi-Fi, the OnHub also has technology and standards built in that will
connect to upcoming smart gadgets, including 802.15.4, Weave, Zigbee and
others.
It isn't just the hardware that's impressive; Google has
redone the router's software as well. It's controlled via the GoogleOn
app, which is available for both Android and Apple gadgets.
GoogleOn
shows you what gadgets are connected, how much bandwidth each gadget is
using, how fast the network and Internet connection are running, if
there are network problems and more.
You can adjust what gadgets get
more bandwidth, easily share Wi-Fi passwords with visitors and control
your network from outside your home.
Setup is even easy. Just hold
the gadget with the GoogleOn app near the router and they sync up using
audio tones. No fumbling with IP addresses or passwords to get started.
Of
course, there are a few caveats. It only has a single Gigabit LAN port,
so you can forget connecting multiple wired gadgets. It also only has a
single USB port.
That's not really an omission want to see in a
$200 router (that's for the TP-LINK version. The ASUS is $210). However,
if you're sure you only need wireless connections, the style and
simplicity is worth serious consideration. Shop the OnHub on Amazon
D-Link AC3200 Ultra Tri-Band Wi-Fi Router
Both
of the previous routers were dual-band AC1900 routers. That means the
combined bandwidth of the bands equaled 1,900Mbps. However, the D-Link
we're talking about is an AC3200 tri-band.
It has the typical
600Mbps 2.4GHz, but is has TWO 1,300Mbps 5GHz networks. Using Smart
Connect Technology, the D-Link can assign every gadget to the network
that makes the most sense, similar to the OnHub.
So, slower
802.11n gadgets will always connect to the 2.4GHz network, while two
802.11ac gadgets trying to stream high-definition video will each get
their own network so they don't interfere. The more gadgets you have,
the more intelligently it balances the load so no one network is
overwhelmed.
In addition, like the ASUS earlier, the D-Link has
Smart Beam Forming technology that sends Wi-Fi in your gadget's
direction to reduce dead spots. However, with a 1GHz dual-core processor
and six antennas to the ASUS' three, it can handle more gadgets.
Like
the ASUS it also includes four Gigabit LAN ports and two USB ports for
attaching external storage, printers and other things you want to share
on the network.
D-Link has also taken a page from Google's book
and streamlined the software. It makes it easier to turn on parental
controls, see and block connected gadgets, create guest networks and
more.
Of course, that's just the kind of thing you'd expect with a
price tag of $277 on Amazon. Yep, this router is actually more
expensive than some computers. Then again, if you have a household
filled with media-guzzling gadgets, it could be just what you need. Shop the D-Link AC3200 on Amazon
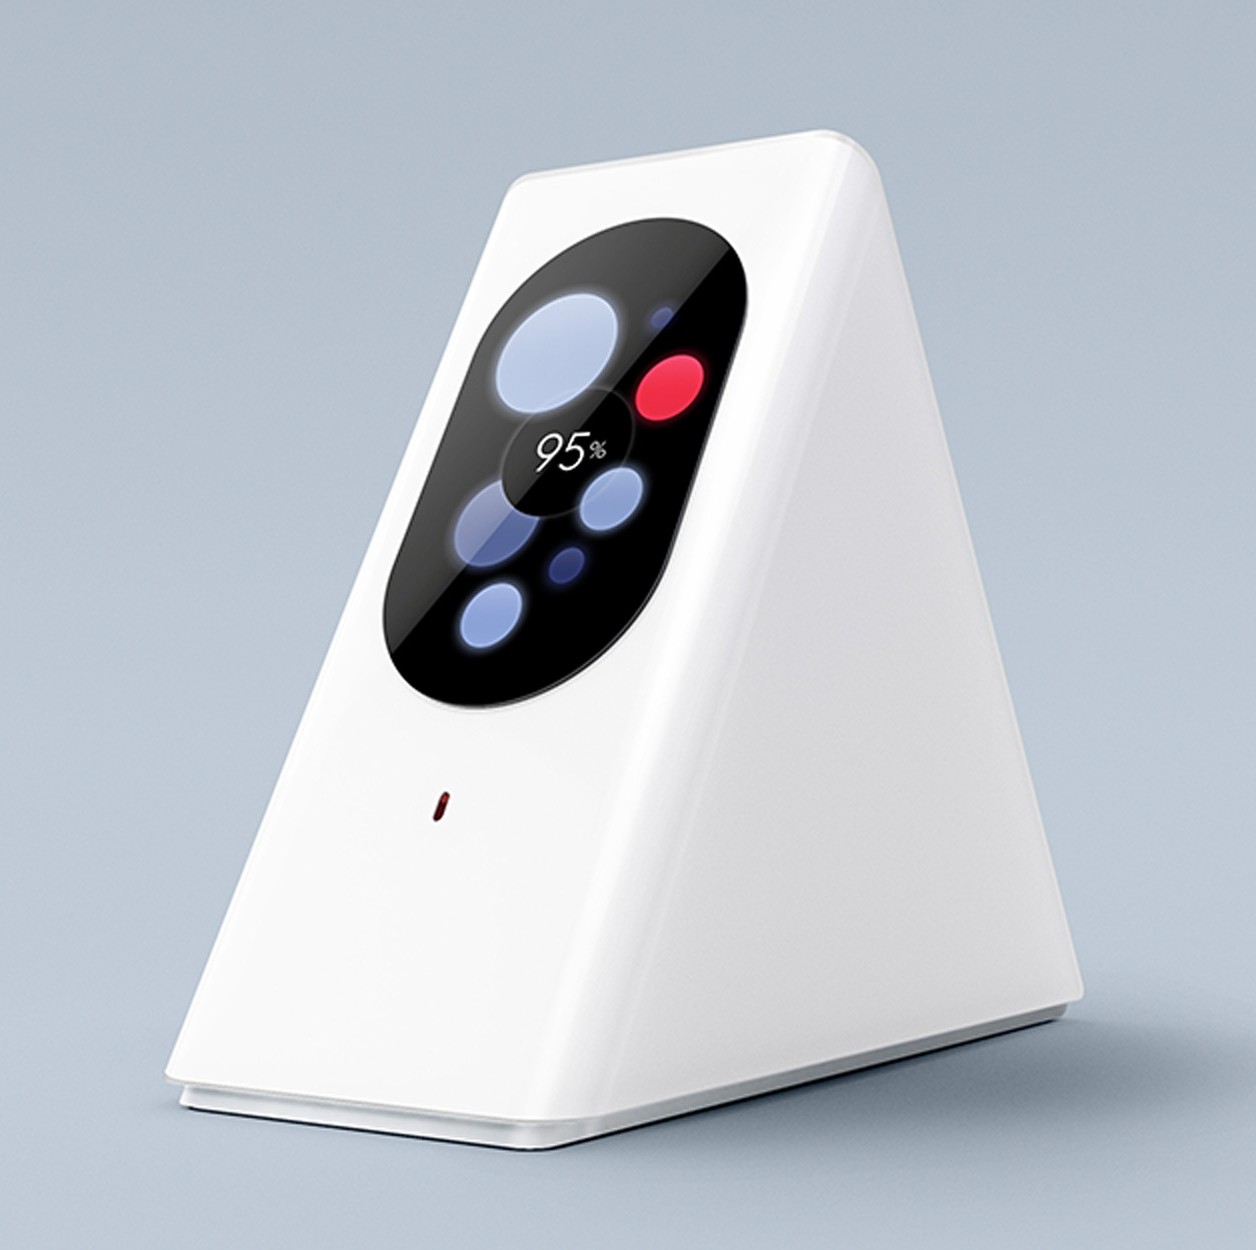
Bonus:
This
router is still in the pre-order stage, but since we're talking about
routers with huge price tags, we have to mention it. It's called
the Starry Station from Project Decibel.
Like
Google, Project Decibel is on a quest to revolutionize routers, and
came up with a compelling design. It has a touch screen for easy control
and information. For example, it can tell you exactly how your network
and Internet are performing and help you find and fix slowdowns. Plus,
it works as a hub for future smart gadgets.
Of course it's
currently pre-ordering for $350, which is hugely expensive. Of course,
it's also a stepping stone toward Project Decibel's idea for wireless
broadband Internet. Learn more about that intriguing idea.
HTHC Comments I think spending any more than $175 on a wireless router is crazy. Note that to take advantage of the newer wireless router technology requires your computer to have a 802.11AC compliant wireless network card.
12:39 PMHigh Tech House Calls, Expert Computer Consulting
If you’ve got a dodgy Apple-branded USB-C cable, you might be able to get a new one for free.
On Friday, the company announced a new program
to replace the USB-C cables that came with 12-inch MacBooks sold
through June 2015. According to the company, these cables can stop
working due to a design flaw. As a result, your MacBook may not charge
reliably when using a defective cable with a power adapter. Apple
The replacement cables have a serial number printed on them; the old ones don’t.
The new cables look identical to the old ones, except for the
addition of a serial number printed on the cables. Apple-branded USB-C
cables purchased separately are also eligible for replacement under the
program.
If you qualify for a replacement and Apple has your name and a valid
mailing address on record (either because you registered your MacBook or
ordered it through the Apple Online Store), you don’t have to do
anything, and you can expect to receive a new cable in the mail sometime
this month.
Otherwise, you’ll need to contact Apple, visit your local Apple
Store, or get in touch with a local Apple Authorized Service Provider to
get your new cable. Head on over to the Apple Support site to get the full details of the replacement program, and to find out if your MacBook qualifies.
12:33 PMHigh Tech House Calls, Expert Computer Consulting
If you've ever reached for your smartphone only to find it missing,
you've felt that not-so-fun jolt of adrenaline and trickle of dread.
After all, it's an expensive piece of technology, and it holds precious
photos, text messages and a lot of personal information.
And as
you search around the house, car and other places you might have set it,
the feeling of panic only gets worse. Hopefully when this has happened
to you, it ended with relief at finding your phone safe and sound.
However, it's far too easy for a thief to walk off with a smartphone, or
for it to fall out of your pocket or purse in a place you don't
remember going. That's why you need to do one thing right now.
We strongly recommend that you install the Android Device Manager
app on your smartphone.
Depending on your phone, you might just need to
go to the Google Settings app and tap "Security." Then under "Android
Device Manager" turn on "Remotely locate this device," and "Allow remote
lock and erase."
Once this is done, if your phone disappears you can quickly log in at https://www.google.com/android/devicemanager
using your Google Account. From here, Google will try to pinpoint your
gadget's location on a map. Note that it might not get able to get a fix
until whoever is using the phone wakes it up, so don't give up if
there's no information right away.
Android Device Manager also has
a few other options. You can also choose to ring the gadget in case
it's just hiding under a couch cushion. If you don't have the lock
screen set up on your gadget (you really should),
you can remotely lock the phone and even put a message on the lock
screen, such as a number to call, in case someone finds it. In extreme
circumstances, you can erase the phone remotely so thieves can't get
your information.
We strongly recommend setting this up now and
testing it out to see how it works. It's better to take a minute now to
set it up than spend days later regretting that you didn't.
With
that being said, we do have an important safety announcement we need to
make. If your phone is actually stolen, and you get the location, DO NOT
try to retrieve the phone yourself.
People have died trying to get their phones back from thieves. You need to get the police involved.
Also,
note that the GPS tracking isn't always accurate. We tested it out with
a phone recently, and it showed it at the car wash next door rather
than the Komando offices.
That's
another good reason to get the police involved. You don't want to be
the one causing a scene trying to get your phone back from an innocent
bystander.
10:20 AMHigh Tech House Calls, Expert Computer Consulting
The
last time I bought a new smartphone, I went to the store thinking I’d
spend a little more than $200. I left having spent close to $300 to get a
phone with more storage and a case.
It
wasn’t until I got home that I realized I had thrown away close to $75
when I didn’t have to. And just like that I fell victim to one of the
tech industry’s biggest rip-offs.
Yes, I may be a tech reporter, but I’m not immune to falling for the scams. It can happen to anyone.
Fortunately,
the best way to avoid getting ripped off is to know when it will
happen. So to help you avoid needlessly throwing away your cash, we’ve
put together this list of the biggest tech rip-offs.
The
most well-known and egregious example of tech companies trying to
separate you from your money comes in the form of the humble HDMI cable.
Walk
into any big box retailer to buy a new TV and chances are the sales
person will try to sell you on a high-capacity, gold-plated,
4K-compatible HDMI.
Well, that’s all a bunch of crap.
The
truth is, there is no difference between a $100 HDMI cable and a $10
HDMI cable. The only thing you need to know when buying an HDMI cable is
that it says “high speed” on the box. That means it can output images
with resolutions of 1080p and higher. Yep, that’s it.
Even if you buy a brand-new 4K TV, you can still use your old high speed HDMI cable without issue.
And
don’t let anyone ever try to tell you that you need specially insulated
HDMI cables to protect them from interference from other electronic
devices. HDMI cables don’t suffer from quality degradation. They either
send a perfect picture to your TV or don’t — there’s no in between.
Being overcharged for phone storage
We’ve previously covered this topic, but it bears repeating: The profit margin on a smartphone with 32 GB of storage versus one with 16 GB of storage is ludicrous.
The
price difference between a 16 GB iPhone 6s and a 128 GB iPhone 6s to
you is a whopping $200. But the difference in manufacturing costs to
Apple is just $53.
How
can you keep from being gouged? Well, you could opt for a 16GB iPhone
6s and rely on the cloud for all of your storage needs or go with a 64GB
model and lean on the cloud a bit less.
If
you’re an Android or Windows Phone fan, you can get around this entire
problem by opting for a handset with a removable microSD storage card.
That way you can up your storage capacity on your own terms.
Productivity tablets without keyboards
Microsoft’s
Surface Pro 4 and Apple’s iPad Pro are both tablets designed with
productivity in mind. So why is it that you need to pay an extra $130
for Microsoft’s Surface Pro 4 Type Cover keyboard and $170 for Apple’s
Smart Keyboard?
For
what it’s worth, Apple doesn’t prominently feature the Smart Keyboard
on the iPad Pro site. Microsoft, however, shows the Surface Pro 4 with
the keyboard attached to it more often than not. That feels just a tad misleading.
Microsoft
puts a small asterisk next to the $900 starting price on its website
that points to a disclaimer at the bottom of the page admitting that the
keyboard is sold separately.
If
you want to save some cash on one of these keyboards, there are a
handful of less expensive third-party keyboard covers for the Surface
Pro 4 and the iPad Pro. If you really want to save a buck, you could always just pair a regular Bluetooth keyboard with either slate.
‘Starting’ prices
While
I’ve got my old man hat on, let’s talk about starting prices. Going
back to the Surface Pro 4 and iPad Pro example, Microsoft and Apple say
their tablets start at $900 and $800, respectively. But (as noted) those
prices don’t include keyboards, and in Apple’s case it doesn’t include
the company’s $100 stylus.
To
get a Surface Pro 4 with the keyboard, you’ll actuall
Furthermore,
the base-model $900 Surface Pro 4 also comes with a relatively low
powered Intel M processor, which will have trouble doing things like
running multiple programs or doing serious photo and video editing.
If
you want a Surface Pro 4 with performance equal to a real laptop,
you’ll have to jump up to the Core i5 model — which means you’ll have to
pony up an extra $100. That brings the total up to $1,130, which is a
pretty big jump from $900.
Apple,
meanwhile, sells its base iPad Pro with just 32 GB of storage space —
not much for a productivity tablet. That means you’ll have to either
rely on iCloud for your storage needs or jump up to the 128 GB iPad Pro
for $950; throw in a keyboard case and stylus, and you’re looking at a
total cost of $1,220.
I
don’t mean to pick on Microsoft or Apple; pretty much all tech
companies play the base-price game. But that doesn’t make it feel any
less like a rip-off and a disservice to consumers.
First-party peripherals
The
keyboards for the iPad Pro and Surface Pro 4 are also examples of a
wider problem: If you need a replacement mouse, keyboard, or cable for a
computer, television, or smartphone, you don’t need to buy them from
the same company that made your laptop or tablet.
First-party peripherals are usually no better than those made by third-party companies, but are generally more expensive.
Take
Apple’s $35 silicon iPhone 6s case. Go to Amazon, and you can spend $10
on an iPhone case that protects your handset just as well as Apple’s.
The same can be said of your computer mouse, keyboard, or charging
cables.
Curved TVs
We’re fresh off of another Consumer Electronics Show,
where once again TV manufacturers were pushing the wonders of curved
screen televisions. But despite claims from companies that such curved
displays make for a better viewing experience, the truth is that it’s
all a bunch of bunk.
The
idea behind curved TVs is that they simulate the curved display you
find in movie theaters. But theater screens are curved for a reason:
Projectors in theaters send light out from a central location, usually
lined up with the middle of the projection screen.
That
means the sides of the theater’s screen are further away from the
projector than the screen’s center point. That discrepancy can cause
visual distortions at the edge of the image.
Home
TVs don’t have the same projection problem as movie theater screens,
and so curved screens serve no real purpose. In fact, the curved screen
can make watching TV more difficult, as it limits the field of view for
people sitting to the far left or right of the television.
Instead of wasting your money on a curved TV, just buy a regular flat-screen TV.
HTHC Comments:
You can buy very cheap HDMI cables that are worthless. Very thin cables don't work or don't work well. Look for cables that have the gold part molded securely to the end of the cable. Be aware that very long cables may not work with your application. My MacBook will not display onto a TV with a cable longer than 6'.
Forget buying a SmartPhone with less than 64 GB's of storage. It will not have enough storage for even basic needs regardless of how thrifty you are with your apps, pictures, and songs. SmartPhones that have the ability to access an micro SD card are becoming rare. One of the reasons I bought a Samsung Galaxy S5 was the ability to add a SD card. The new and improved S6 no longer has that feature. Storing things on a micro SD card are not as straight forward as storing things on the internal storage of your SmartPhone. Certain applications refuse to work with a micro SD card such as Amazon Prime video.
7:00 AMHigh Tech House Calls, Expert Computer Consulting
There’s
no getting around it: there will always be people you just don’t want
to talk to. For many of us, those unwanted calls come in the form of
persistent ex-lovers trying to rekindle what has been lost or
telemarketers offering an all-expenses-paid luxury cruise to a tropical
island off the southern tip of Costa Rica. Thankfully, Apple’s
most-recent mobile operating system and the iBlacklist app have finally
supplied a workaround method for blocking pesky callers. Whether the
separation is merely temporary, or more permanent, is entirely up to
you.
Here’s
our how-to guide about how to block calls with an Apple iPhone
regardless of your OS version. You won’t be able to block unlisted
numbers and those blocked using other methods, but at least you’ll be
able to bar any known number from contacting you via phone calls,
messages, and FaceTime.
It’s
been a long time coming, but Apple has finally built an OS with
built-in blocking utilities (and we are better for it). The feature,
coupled with all versions of iOS since the release of iOS 7, allows
users to quickly block calls, messages, and Facetime requests sans any
unnecessary external software or third-party apps. It’s a welcome and
convenient inclusion — one accessible through both your iPhone’s
settings menu and contact list — but one also only available on the
iPhone 4 and later, iPad 2 and later, iPad Mini, and fifth-generation
iPod touch.
Once
properly set up, blocked calls will automatically be routed to your
voicemail. There will be no indication a call, text, or FaceTime request
has been received on your end, but send receipts and other indications
will still appear on the sender’s device as they would normally —
meaning the sender will not be alerted of your decision to block them.
Call blocking is a one way street when using iOS 7 – 9, so you can still
contact blocked numbers via phone call, text, and FaceTime with no
hindrance, if you should decide that you want to.
Step 1: Download and install iOS 7, 8, or 9 — If
you haven’t already, back up your device and upgrade to iOS 7, 8, or 9
via iTunes or your Wi-Fi network. To do so using the latter option, tap
the main Settings icon from your smartphone’s home screen, select the General option near the top of the resulting menu, and then tap Software Update. Ensure your device is connected to a power source and tap the Download and Install button.
Step 2: Navigate to Blocked menu — Tap the main Settings icon when viewing the home screen, select the Phone option from the resulting menu and tap the Blocked option beneath the Calls section. Alternatively, select either the Messages or FaceTime option from the main Settings menu to access the same Blocked menu offered through the Phone settings.
Step 3: Block the number — Tap the blue Add New button and select the desired number you wish to block from the resulting contact list. To unblock a user, simply tap the blue Edit option in the top-right corner of the Blocked menu, followed by the red subtraction sign directly beside the user you wish to unblock. Afterward, tap the red Unblock button to confirm the changes.
Alternative blocking method — Tap the Phone icon while viewing the home screen, select either all calls or missed
calls and tap the information icon to the right of the number you wish
to block. Now, scroll to the bottom of the resulting info panel, and tap
the blue Block this Caller option, followed by Block Contact to confirm the request.
Next page: Block using iBlacklist (iOS 3,4, 5 and 6).
Block calls using iBlacklist (iOS 3, 4, 5 and 6)
Not everyone has the option to upgrade to iOS 7 given the hardware limitations of older devices. Luckily, the iBlacklist
app does a fantastic job of blocking both calls and texts from specific
people or unknown numbers if you’re willing to risk jailbreaking your
iPhone and shelling out an additional $12 in the Cydiaapp store.
It’s not a difficult or a lengthy process, but it’s one effective way
to block unwanted communication. Check out the iBlacklist manual at the
top the application’s website for a detailed, photo-laden rundown of the
software and all of its features.
Step 1: Navigate to the iBlacklist app — To
begin, tap the Cydia icon on your phone, search for “iBlacklist” in the
search tab, and select the app from the search results. We’re assuming
you’ve already jailbroken your iPhone and have access to the Cydia app.
If not, refer to our guide for how to jailbreak your iPhone to unlock the alternate store.
Step 2: Download and install the iBlacklist app —
Follow the on-screen instructions for downloading and purchasing
iBlacklist. When done downloading, click “Close Window” to close Cydia
and return to your homescreen. You may have to restart your phone before
the changes will take effect.
Step 3: Block the number — Scroll through your apps to find the iBlacklist icon and open up the app. Tap Blacklists from the main menu to access your current blacklisted groups and numbers. To add a new number tap Add new Blacklist, and select Import from Address Book to block an entire contact list. Alternatively, select General BL,
and tap the addition sign in the upper right-hand corner to add
individual contacts from your address book, recent calls list, recent
SMS list, or to manually enter a number and accompanying contact info.
Step 4: Toggle blocked forms of communication — After you’ve entered the contact to be blocked, look for the red call icon on the configuration role. Set the switch to On
to block incoming calls from that contact. You can also block SMS, MMS,
and FaceTime by toggling the switches next to the red icons for each
form of communication.
Step 5: Set action for blocked calls — Now you’ll need to tap Action
when viewing a contact to choose your desired action when the unwanted
call comes in. You can choose to accept the call, immediately accept and
hang up, send the caller straight to voicemail, issue a busy signal or
block the call before your phone even rings. When finished, close the
contact and the changes will be automatically saved. Continue blocking
people in the same manner until you’re satisfied with your blacklist.
Next Page: Block calls using Do Not Disturb mode (iOS 6)
Block calls using your phones Do Not Disturb mode (iOS 6)
Although
iBlacklist is the best option for blocking calls for those lacking iOS
7, it may not be the most enticing. Jailbreaking your iPhone voids your
warranty and opens your smartphone up to a slew of stability and
security issues that may leave some users skeptical about taking the
plunge.
That being said, the built-in Do Not Disturb
mode in iOS 6 can accomplish the blocking task to a certain degree, but
it essentially works in reverse. Instead of receiving incoming calls
from everyone but the contacts you block, the tool will actually block
incoming calls from everyone but the contacts you allow. It’s overkill,
yes, but a nice option if you want to drop off the radar for a spell and
only receive calls from a select few individuals, especially given iOS 6
is available for older devices incompatible with iOS 7.
Step 1: Download and install iOS 6 — If
you haven’t already, back up your device and upgrade to iOS 6 via
iTunes or your Wi-Fi network. To do so using the latter option, tap the
main Settings icon from your smartphone’s home screen, select the General option near the top of the resulting men, and tap Software Update on the resulting screen. Afterward, ensure your device is connected to a power source and tap the Download and Install button.
Step 2: Open the Do Not Disturb settings — Click the Settings icon with the gears, tap the Notifications and select the Do Not Disturb option at the top the list.
Step 3: Set the utility specifics — Once
opened, you can schedule the mode to automatically turn on during
specified hours hours of the day and select the contacts you wish
to receive calls from. Simply choose the Allow Calls From option
and choose favorites to allow calls from contacts on your favorites
list. Alternatively you can select no one and everyone (which seems
counter intuitive, if you ask us). There’s also an option to toggle on RepeatedCalls, an option that doesn’t silence phone calls from the same person if they call you more than once within three minutes.
Step 4: Activate theDo Not Disturb mode —Finally, toggle on the Do Not Disturb mode
from your iPhone’s main settings to initiate the function. When active,
a crescent moon icon will appear to the left of the clock at the top of
your phone, indicating that the comprehensive blocking feature is in
full effect.
Next Page: Block calls at the carrier level
If
no amount of finagling gets call screening working properly on your
iPhone, there’s the nuclear option: carrier-level blocking. Sprint,
T-Mobile, and Verizon offer the service, albeit not in all cases
without restrictions.
If you’ve got an online account with Sprint, blocking a number is as easy as logging into Sprint.com, navigating to the My Preferences tab, then Limits and Permissions, and finally Block voice.
From there, you can select the phone numbers you’d like to block, or
block all outbound and/or inbound voice calls for however long you wish.
It’s a relatively simple process with T-Mobile, too. Sign in to your account, and then click Tools > Family Allowance > Access Family Allowances. From the Blocking Numbers menu, you can choose up to 10 contacts.
In
contrast to T-Mobile and Sprint, Verizon makes blocking specific
numbers a bit of a hassle. To activate call screening, log in to your
account and select Manage Verizon Family Safeguards & Controls. Then, pull up Call & Message Blocking Feature
and add numbers. You’re limited to five, and they’ll reset every 90
days — permanent blocking requires Verizon’s $5 a month FamilyBase plan.
Next Page: Call-blocking apps
Sometimes,
built-in settings and carrier-level blocking don’t provide the level of
customization you desire. That’s where third-party apps come in. Many
services sport spam databases and location-based blocking fare more
versatile than any of iOS’s options, and at the very least should help
prevent that out-of-state political campaigner who keeps asking for your
social security number from ever calling again.
Whitepages
ID might best be described as a crowdsourced call screening tool. While
not a number blocking app per se, the service helps you avoid scammers,
telemarketers, and other unwanted callers by comparing incoming calls
to a directory of 500,000 rated numbers. It alerts you when there’s a
match, and lets you report new spam to the Number Cop community. If you
let it, the app will scan your text messages for potentially
malicious links, too.
The
conceit of Call Bliss is simple: You can block numbers depending on
scenarios like the time of day, location, or activity. If you’re at
home, for instance, you can let your wife’s calls through while
silencing your co-workers’ numbers. And you can create groups of numbers
that you can block with a single tap, such as “friends” or “family.”
There’s a master blacklist option, and a “Suppress All Callers” mode to
send all calls to voicemail. The only downside? Call Bliss requires iOS 6
or later.
If
you’re looking for a no-frills call blocking app, iWhitelist will more
than likely satisfy. It silences calls and notifications from numbers
that you’ve added to a blacklist, and gives you granular options for
each entry in said blacklist. There’s a whitelist option, also, for
those times you’d rather not be bothered by any but a select few calls.
TrapCall,
a paid service, takes a different approach to number filtering. Rather
than block calls indiscriminately, any number the service identifies as
blocked or restricted is automatically “unmasked” when you reject the
call; TrapCall collects the name, address, and phone number of callers
without caller ID. After doing so, it rings you back with the unblocked
number and sends you an SMS with the aforementioned information.
6:53 AMHigh Tech House Calls, Expert Computer Consulting
I'm not the sort of person who gets worked up about operating
systems. To me they're the zeros and ones that transform a pile of
components into a working computer. But to some operating systems are
something to get all hot and bothered over.
Regular readers will
know that a few years ago I made the transition from Windows to OS X
for my workhorse systems, a move that to this day I don't regret, but
that doesn't mean that I don't regularly make use of Windows. Why
wouldn't I? I have over two decades of experience with the platform. And
when it comes to Windows 10, I think that after four months of
maturation following general availability, this is Microsoft's best
operating system release to date.
But Windows 10 is also facing a
level of challenge unlike any before. While some of it is down to
genuine concerns, most stem from media hype, lies, rampant fanboyism, or
a gross misunderstanding of how tech works. While I don't care about
your beliefs either way, I do care about misinformation. And the amount
of Windows 10 misinformation being spread is staggering, and almost
daily I find myself being exposed to, or dragged into, conversations
about Windows 10 that have little or no basis in reality.
What
I'm going to do here is try to address some of the misinformation that
I've come across voiced by the Windows 10 critics - which, because of
the time of year I'm going to refer to as "Grinches" - which, for
whatever reason, seem determined to fabricate and spread nonsense.
If you're fervently anti-Windows 10 then I don't expect to or want to
change your mind (I honestly don't care what OS you choose to use), but
if you're sitting on the upgrade fence because you've heard bad things
about Windows 10 and are not sure what to believe, my hope is to inject
some clarity (and sanity) into the debate.
I'm going to address
four of the most commonly voiced concerns, and I'm going to start with
what seems to be the hottest topic - privacy.
Privacy
The Grinches say: "Microsoft is spying on Windows 10 users!"
I'm going to say this in the clearest and most concise way I can - Microsoft is NOT spying on Windows 10 users. Period.
I've come to this conclusion independently by
examining the sort of data Microsoft is collecting, reading through the
extensive privacy documentation that Microsoft has produced, and even
doing some "digging for dirt." Despite all that, I could not find a
single shred of evidence to suggest that there's any spying going on.
And as far as I'm aware of, no one else has any evidence either.
And those who accuse Microsoft of spying have also not been able to
produce any evidence. Their "evidence" consists of misunderstandings,
half-truths, and outright fabrications. It's the sort of "proof" that
would feel perfectly at home in a late night documentary about UFOs or
Bigfoot.
Yes, it's true that Windows 10 collects and sends a lot
of data to Microsoft, ranging from recordings of your voice when you
talk to Cortana, to crash data when the wheels fall off your PC, but
this data collection happens in order to make things work or to help
things work better in the future, not because you're being spied on.
And you can turn off most of this off if you feel so inclined.
While it's true that the collection of telemetry data that's collected
cannot be turned off (at least not by the average user, enterprise
users do have that option), there's nothing underhanded going on. In
fact, Microsoft's been doing this since the days of Windows XP.
The data transmission and collection that's happening in Windows 10 is
not unique to the platform, and is, in fact, normal and is something
that's built into most modern operating systems.
If you really don't like it, then I'm sure there's a Linux distro for you somewhere.
While I can say without a doubt that Microsoft is NOT spying on
Windows 10 users, I will admit that it has handed ammunition to its
critics. Scattering privacy settings all over the operating system, and
not giving users a way to opt-out of data collection
are decisions that, in my opinion, haven't helped facilitate
transparency and build trust. It's the tiny bit of fact that the
Grinches use to say that "there must be something going on."
Now four months ago I would have agreed with anyone who voiced
concerns about stability. In my experience - and judging by what users
were telling me, and horror stories I was coming across on the forums -
things were rocky despite a long public beta phase. But these days betas
seem to be more about marketing and building up hype than bug fixing,
and products have to be released according to a schedule (something
that's equally true of Apple's iOS and OS X), so there's always going to
be teething troubles.
But four months on and Windows 10 feels
like completely different. Not only has the operating system improved
thanks to updates (the November update in particular made a huge
difference), but so have drivers and third-party software (which make a
huge difference to stability).
Some of these fixes and improvements will be down to the telemetry that Microsoft collects from crashing Windows 10 machines.
In my experience most of the problems that people have with Windows 10
come down to upgrading systems that were already suffering from
complications.
Forced updates
The Grinches say: "Windows 10's forced update policy is dangerous!"
While it is possible that a misconfigured update can bring a system to
its knees, I've seen far more systems trashed by users who didn't
update their operating system and then got hit by malware.
There's always a small risk associated with any update, whether that be
an operating system update, an update for a software package, or updates
for antivirus or other security apps. No matter how much care the
software maker takes, duff updates do occasionally slip out into the
wild. Is this a valid reason to not keep Windows updated?
No.
The bottom line is that rapid patching is the single best way to keep a
system secure whether it's Windows, OS X, Linux, iOS or Android. To
recommend that users indefinitely delay installing updates is
irresponsible and down right dangerous.
Performance
The Grinches say: "Windows 10's is a performance pig, especially on older systems!"
On the wide variety of test systems I've installed Windows 10 onto
over at the PC Doc HQ, I've not noticed anything that scared me. In
fact, most systems felt snappier. The before/after benchmark tests I've
done on systems suggest that upgrading a Windows 7/8.1 system to Windows
10 has a negligible effect on system speed.
On the few systems
that did feel a little more sluggish, OS and driver updates seem to have
brought back any previously lost performance.
The bottom line
Windows 10 is a good operating system. For the average user it brings
with it improved security, and if they're already running Windows 8.1
then it doesn't offer much in the way of a learning curve. For Windows 7
users it's a nice refresh and an opportunity to blow out those cobwebs
and give an old system a new lease of life.
If the Windows 10 compatibility checker
gives you the all clear to upgrade a system, I don't see a valid reason
to delay any more. Make a backup, pull the trigger on the installation
and go see for yourself. If you like what you end up with then great, if
you don't then roll back to your old installation and get on with life.
Simple.
If you're a diehard Windows 7 or Windows 8.1 faithful
then just stick with what you've got. Support-wise you're good until
January 2020 and January 2023 respectively, which gives you plenty of
time to find the perfect Linux distro to upgrade to.
HTHC Comments: I agree with the majority of this article.
I have found on older computers that the performance has suffered when applying the update. Besides adding more memory, I upgraded the hard drive to a Solid State Drive to address performance issues.
If you have a BluTooth mouse or keyboard, drivers for Windows 10 for older computers are non existent.
Problems with printing and working in a Home Group environment have gone away. I would agree that Windows 10 is stable.
Are you being bombarded by messages from Microsoft concerning time running out on your "free" Upgrade to Windows 10? You have until the end of July to qualify for a free upgrade.
For your convenience Venmo and Zelle are also accepted for payment.
Fed up with Windows based computers?
Think an Apple Computer might be what the doctor ordered?
We can help you with that decision for free! Give us a call so we can discuss your computing needs!
Gift Certificates
What will you use your certificate for?
Making the move to an Apple laptop? My business has been running on an Apple laptop for 6 years.
You bought an iPhone. Now what? We have been working on iPhone problems since they came out and we can help.
Summer will be here before you know it. You want to surf on the internet on your wireless network from your pool. We are wireless network experts in both design and deployment.
Or you can use this gift card for any help needed (including training) for the computers in your home or small business.
The perfect present for any occasion:
Available in one hour increments.
No expiration date.
Can be used for service calls or training.
Giving a technology gift that requires setup or training? Why not add a gift certificate?


 Apple
Apple 


